Work Area in Adobe After Effects | How to Use & Customize
The Work Area in Adobe After Effects is an essential tool that helps you focus on specific parts of your timeline. It allows you to preview, render, and edit only the selected portion of your composition. In this guide, you’ll learn how to use and customize the Work Area for a smoother workflow.
1. What is the Work Area in After Effects?
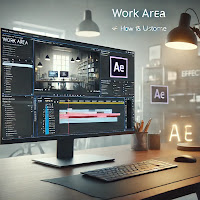
The Work Area is a gray bar located at the top of the Timeline panel. It defines the portion of your composition that will playback or render when previewing or exporting.
✔ Helps speed up previews by focusing on a small section.
✔ Reduces render time by limiting the output to selected frames.
✔ Makes editing easier by working on a specific part of the timeline.
2. How to Set the Work Area
Setting the Work Area is simple:
Method 1: Using the Mouse
1️⃣ Locate the Work Area bar above the timeline.
2️⃣ Drag the left handle to set the start point.
3️⃣ Drag the right handle to set the end point.
🎯 Tip: This method is great for quick adjustments!
Method 2: Using Keyboard Shortcuts
📌 Set Work Area Start – Move the playhead to the desired position and press B.
📌 Set Work Area End – Move the playhead to the desired position and press N.
🎯 Pro Tip: Use Shift + B and Shift + N to snap the Work Area to layers.
3. How to Preview Only the Work Area
After setting the Work Area, press 0 on the numpad to preview only the selected section.
Faster Previews with Work Area
✅ Helps preview effects without lag.
✅ Reduces RAM usage for smoother playback.
✅ Works great for adjusting small animations.
4. How to Render Only the Work Area
You don’t always need to render the entire composition. To export only the Work Area:
1️⃣ Go to Composition > Add to Render Queue.
2️⃣ Under Render Settings, select Work Area Only.
3️⃣ Choose your format and click Render.
🎯 Alternative: In Adobe Media Encoder, select Export Range: Work Area for faster renders.
5. How to Reset or Remove the Work Area
If you no longer need the Work Area:
📌 Double-click the Work Area bar – This resets it to the full timeline.
📌 Press Ctrl + Shift + X (Windows) or Cmd + Shift + X (Mac) to clear the Work Area.
🎯 Best Practice: Keep the Work Area small for large projects to avoid performance issues.
Final Tips
✅ Use Work Area to speed up animation previews.
✅ Shorten the Work Area when applying heavy effects.
✅ Always reset the Work Area before final rendering.
✅ Combine with Region of Interest (ROI) for faster exports.
Conclusion
The Work Area in After Effects is a powerful tool for optimizing previews and rendering efficiently. Whether you're working on small animations or long projects, customizing the Work Area saves time and boosts performance. Master it today for a faster and smoother workflow! 🚀